 |
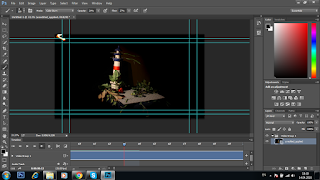
| Adding light to creatures |
Friday, 22 April 2016
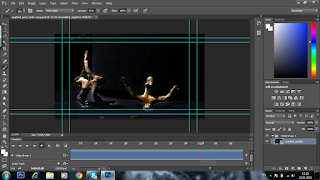
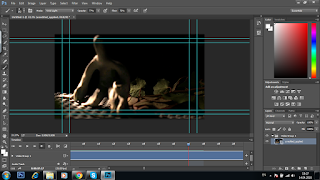
A Tale In The Sting: 2D Rotoscope Animation
Thursday, 21 April 2016
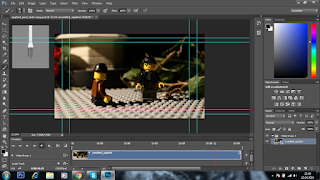
A Tale In The Sting: Stop-Motion and Assembling of Footage
 |
| Stop-motion X1 stills |
Wednesday, 20 April 2016
A Tale In The Sting: Creation and Assembling of Characters
Alongside the design plan again, it did not take me long to gather the parts for the Lego character since I am pretty aware of the choices I can make hence I know 95% of my collection by heart. Having said that, I already knew which parts I'm gonna need (based on the ones I already have), and it was a matter of finding them and assembling them. Whereas the clay characters I molded with care without using internal wiring hence they are too small to weigh down as they remain idle. Nevertheless, I could not possibly do character design since none of the characters are 2D or meticulously crafted, since I needed the creatures to be as ambiguous as possible.
Tuesday, 19 April 2016
A Tale In The Sting: Assembling of Set
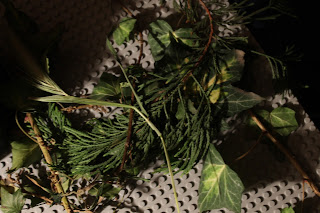 Already having devised how I am going to create my set and which materials I am going to use, I started crafting the set in order to begin my animation. Following my set plans, I went through town (Skopje) and gathered all sorts of green plants, ranging from birch and vine leaves to grass and bush leaves, all different and versatile plants. I wished to make a set a bit organic in juxtaposition with the inorganic plastic that are the Lego minifigures and the faceplate. Although in Waiting for Godot the environment is desolate with only one tree, it is not quite as dark and ambiguous as mine is - thus why I chose to add the plants to the stage. Another reason is to complete the mise-en-scene, for without such elements the background seems incomplete and aesthetically empty. Furthermore, I positioned the plants so that there is a barrier in between where Pozzo and Lucky will be assembled by the creatures and where Vladimir and Estragon will be assembled. The finalization of the greens in the set came with the vines I placed on the edges, which give the creatures a tool with which they can climb on the island. Although I dislike straying away from original concrete ideas in animatics, I found out that the clay figures cannot naturally stick to the material of the stool, and thus had to implement the vines. Just goes to show, in the future I need to have a bigger consideration for such situations, thinking through the outcome thoroughly. In a really spontaneous attempt, I found a miniature replica lighthouse in my house which I thought would perfectly serve as the unifying object of the island, something that marks and emphasizes the construction of the set, as well as hinting that the space is devoid of surroundings (as lighthouses are placed on coasts where no people reside - something that has became a conventionally associated image with the word "lighthouse"). As for the lighting, considering that the surrounding environment has to be extremely dark to signify desolation, I only used one lamp, differentiating from my 2-lamp preference, solely because of two things: the shadows that are gonna be formed add to the atmosphere, and that one lamp can place an overhead focal point on the set and nothing more. Having said this, I had to make the surrounding as black as possible which would level down my post-stop-motion 2D work where I darken all the elements of my room (yellow walls, guitar, bed, etc).
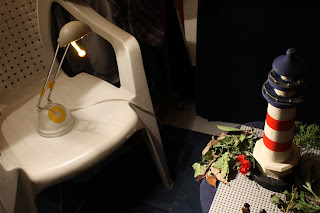 |
| Lighting of the set |
Monday, 18 April 2016
Another Dimension: Maya - Learning Movement
As sessions follow up, we begin to get more and more intricate with Maya, as during today's session we learned additional conventional tools that exact the notion of movement and animation through Maya, in contrast to the last ones where we just learned the manipulative tools and the basics of creating shapes and models. Following up and referencing the notes I had made from the previous sessions, I had no difficulties keeping track with what was being taught, and even more so I managed to proliferate my notes with some more useful shortcuts and functions. Primarily, this session taught us the basics of animating with Maya, beginning with the placement of keyframes (s - set keyframe) and how the manipulation of objects interacts with keyframes as Maya animates the in-betweens. Be it rotation, scaling, or movement, I've learned that Maya can coherently process information in terms of animating "tweens" (as they are called in Flash). Furthermore, I was introduced to the Animation tab of tools, where one can create a motion path and attach an object to it so that it follows a distinct pathway and not one generated automatically through Maya's in-betweens. However, for me personally, the most important part of this session was the Deformers which give an object the flexibility of distortion, be it a warp, a curvature, or a twist. All based on loop edges which give an object interactive vertexes, the Deformers work in such a logical way that everything can be controlled manually through coefficients (for example, degrees in curvatures). Come to think of it, the whole software is profusely logical in such a mathematical way that the more you know the more logical it becomes - something that I personally value. Touching up a bit on the manipulation of pre-made models, the next challenge is creating a walk cycle based on the actual conventions of human motion - weight, leaning, position, and joint points. For the cycle that I shall need to make, I will reference the Animation Survival Kit's section on flexible and flowing walk movements so that Moom does not seem like a robot, but instead, a human.
 |
| Screenshots I took just in case I forget the process |
Thursday, 14 April 2016
A Tale In The Sting: Title Sequence Research
Considering the final touch upon the animation at a sooner stage, the title sequence is to be clarified by the introductory names of actors/producers/productions/editors. We've all seen plenty of title sequences, however, by not paying close attention we've failed to identify the subtle artistry behind the title names and how they are introduced to the audience. Furthermore, they are a substantial part of graphic design as well as animation, for different introduction to titles come with different effects: some just pop out, others fade in, while even others are elaborately animated - all conveying a different effect to the tone and atmosphere in a perfect symbiosis with the background mise-en-scene. Having said that, in order to get inspired, I got to look at several title sequences at the website The Art of the Title which is a brilliant site to galvanize animators into understanding and utilizing the conventions of title sequences. To be precise, I looked at two title sequences - the one from "Maggie" and "Snow White and The Huntsman" just to see the information that's projected during the title sequences as well as to see their layout and animation. Having analyzed olden title sequences as well - in particular, the one from "Casablanca" which is a simple cascading of names and positions - I created a general perspective of what I'm going to display after I finish animating, whereas I will consider the layout when the time comes.
Art of the Title - Sequences - http://www.artofthetitle.com/title/the-huntsman-winters-war/
Casablanca Title Sequence - https://www.youtube.com/watch?v=-pYG1Vbgq0o
Art of the Title - Sequences - http://www.artofthetitle.com/title/the-huntsman-winters-war/
Casablanca Title Sequence - https://www.youtube.com/watch?v=-pYG1Vbgq0o
Monday, 11 April 2016
Another Dimension: Maya - Object
Following up to the previous section where we are required to create a truck model, now it's time to let our imagination run wild by attempting to create an object with the knowledge we've acquired of Maya so far. Initially thinking that I will make something as simple as a bottle, I digressed by adding a little pizzazz to the shape of a bottle, making it into a rocket. With a little assistance from one of my peers, one who's much more proficient in the software than me, I was able to both learn a few things about the interface of Maya and to make a next level model interpolated with colors, as well. As I stated, initially I started making a liquor bottle, but strayed away the moment I extruded the vertex of a cone, which accounted for a sun-shaped form consisting of many sharp edges, which instantly reminded me of the bottom exhaust of a rocket. Thus, with this, I had a visualization of how I wanted my rocket to look like and proceeded to reference the notes I made on how to access the move tool, scale tool, and the conventions that alter the meshes of all polygons. All of this refreshed my knowledge of Maya, for it had been a while since I had used it (didn't use it during the break and holidays). Once the rocket had been made, I played around with the rendering software and referenced an online tutorial on how to change the background to while, ultimately finding out that it can be altered by editing the camera settings' environment. Exported with Mental Rey, I sought for the rocket's assemblages of shapes to NOT overlap as these 3D models can extrude and protrude into one another. Overall, I'm satisfied with my rocket as through its development I absorbed a level of flexibility when tinkering with the program, only to be augmented as these following sessions flow.
Wednesday, 6 April 2016
A Tale In The Sting: Design Plan
 As now the idea has been solidified, I created a small design plan that envelops the materials I'll use for making the set, which ones, the layout of all of them, and the structuring of the light source and characters. With this, I wanted to organize my process of animation by structuring my ideas in a coherent piece (otherwise I would have lost the ideas). In the design plan I arranged the placement and layout of all elements and characters, according to which I'll craft the set. For the debris and environmental objects and elements I'll use different plants with which I will set the mis-en-scene, whereas I will place (most probably a miniature tree) an object in the upper left corner of the scene, to have a distinguishable protruding "landmark" that will bind the space together, in a way, tying it all together. In my design plan I also wrote down the paradigmatic appearance of all four characters, for their clothing has a similar tone as in the book (all suit-tie styles of how men in 1930 dressed). Another insight into how I am to dress the characters came from the movie adaptation of Waiting for Godot by Michael Lindsay-Hogg, where I observed the characters' dress code and based this one revolving around that one. For lighting, I will most probably use one light, all depending on how the shadows will form around the characters and debris, for I think they would be a great addition to the atmosphere.
Waiting for Godot - https://www.youtube.com/watch?v=kXmdTUfsfmI
Tuesday, 5 April 2016
A Tale In The Sting: Interim Crit
With this Interim Crit, I was given coherent and plentiful feedback on the processes of documentation, for this animation (due to it being stop-motion) cannot possibly follow the conventional steps of pre-production, production, and post-production. Every little bit of the creative procedure: stage design, creation of props, choice of music and sound effects, and most important - character design - is to be done right before animating. In other words, I could not design the characters as they are to be Lego figures and clay creatures, however, I can do so the moment I start creating the set. One of my peers pointed out to the rotoscope 2D animation that I will do on top of the stop-motion and asked me the question: what would it envelop? Initially considering to make a dark aura around the clay creatures, due to the dark and atmospheric lighting of the animation, my peer pointed out that this might be inconvenient as it would only darken the creatures beyond visibility. Taking this constructive piece of feedback into consideration, I have changed the coordinates of the 2D animation in terms that I will add a light aura around the creatures, making them both more emphasized in contrast and reminiscent of a godly power (as is what my interpretation revolves around). A successful crit gives one motivation for improvement and development, as the steps towards animation begin.
Monday, 4 April 2016
A Tale In The Sting: Animatic
In order to further the visualization of my story, as well as to outline the time frame and the progression of the scene dynamics, I created an animatic. Prior to this year in college, I had never created animatics (or even storyboards, for that matter), however I learned that they play a quintessential role in organized animation. Due to the plethora of dynamic scenes in the 30 second time-frame, this animatic is essential to the step-by-step animation process without any mistakes. After this, I will focus on the creation of the set, the assemblage of the characters, and the introduction of the lighting, as it is time to start animating.
A Tale In The Sting: Generation of Idea and Storyboard

 My interpretation of "Waiting for Godot" revolves around an anecdote (which will be the animated title sequence) that symbolically explains the nothingness that surrounds all of us, as we are waiting for something that does not exist. In other words, waiting is meaningless for what envelops us, our life, our situations, is all that there is - nothing beyond. However, I want to base the animated title sequence on both my interpretation and the aspect of supernaturality and omnipotence vested in beings that reside in our imagination that might be reality but we may never find out (inspired by the 3D vs 4D vs 5D etc... dimensional fluctuation of perceptions, how ones NEVER experience the world as the others do). With this in mind, a plethora of ideas rushed to my head, all just small notions (nothing like the previous module where I had 4 ideas all in all). In a follow-through fashion, I started writing down every scene that came to mind, and after a while, I compiled all of them together in one coherent story - the storyboard. With it, I structured the story, ready for an animatic and the animation. Nevertheless, since this is stop-motion intertwined with 2D post-animation, the design of the characters and of the background comes after the generation, when the set will be created.
Subscribe to:
Comments (Atom)
